⚠️ IMPORTANT DISCLAIMER
This guide is for educational purposes only. Overclocking your Nintendo Switch voids your warranty and carries risk of permanent hardware damage. Proceed entirely at your own risk. We accept no responsibility for any damage to your device or loss of data.
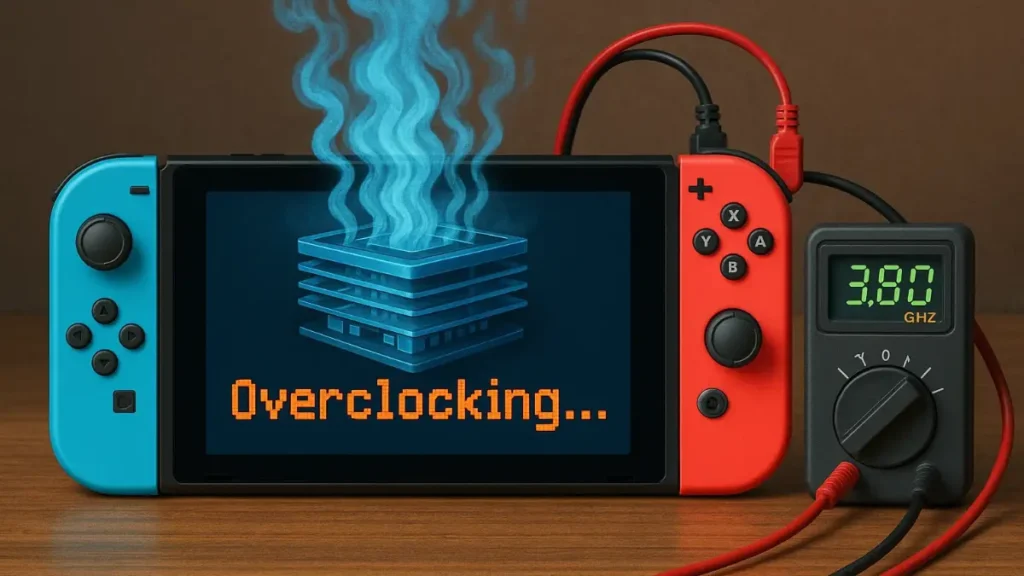
Nintendo Switch overclocking has become the go-to solution for enthusiasts seeking enhanced gaming performance from their console. Although the Switch offers more than solid gaming capabilities, the system runs significantly underclocked from factory settings to preserve battery life and maintain thermal stability. This comprehensive guide will walk you through safe overclocking methods, necessary tools, and critical safety considerations.
Understanding Nintendo Switch overclocking requires knowledge of the underlying Tegra X1 architecture and its capabilities. The Switch’s CPU, GPU, and memory systems can be pushed beyond stock frequencies using custom firmware solutions. However, this process demands careful attention to thermal limits, power consumption, and system stability. Most importantly, overclocking your Switch carries inherent risks that every user must fully understand before proceeding.
Essential Requirements for Nintendo Switch Overclocking Setup
Before attempting Nintendo Switch overclocking, your console must be running custom firmware such as Atmosphère. This requires a hackable Switch model – typically early production units vulnerable to the Tegra bootrom exploit. Later models require hardware modifications (modchips) which are expensive and carry additional risks.
Atmosphère is free custom firmware that patches the system in memory alongside Nintendo’s operating system rather than replacing it entirely. It installs via an exploit in the Tegra chip that exists only in Switch consoles manufactured before June 2018. To check compatibility, enter your console’s serial number on sites like ismyswitchpatched.com. Your Switch must have sufficient cooling capacity to handle increased heat generation from overclocked components.

Understanding sys-clk Tools and Tesla Overlay System
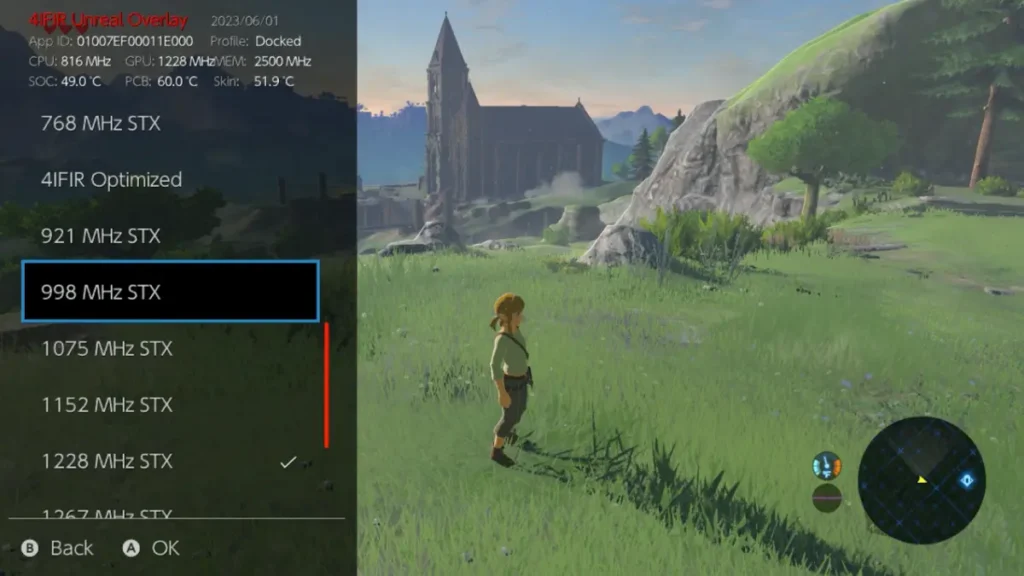
The primary tool for Nintendo Switch overclocking is sys-clk – a system module that allows real-time frequency adjustments. This homebrew application integrates with the Tesla overlay system, providing convenient access to CPU, GPU, and memory frequency controls during gameplay.
The Tesla overlay system is a homebrew framework that gives you access to various tools directly within games. You activate it using the button combination L + ZL + Right Stick (click). After installing Tesla, you can access the sys-clk interface without exiting your game. This system works as an “overlay” – a layer over your current game that enables quick settings changes while maintaining your gaming session.
Safe Nintendo Switch Overclocking Frequencies and Thermal Limits
Conservative Nintendo Switch overclocking starts with memory frequency increases to 1600MHz from the stock 1331MHz. This adjustment alone can resolve many framerate issues with minimal risk. CPU frequencies can reach up to 1785MHz (maximum safe limit), though 1224MHz is recommended for beginners as it provides good performance gains with lower risk.
GPU overclocking offers more substantial performance improvements but requires careful thermal monitoring. Safe handheld frequencies typically max at 460MHz, while docked mode can handle up to 768MHz with adequate cooling. These represent conservative limits – experienced users may push higher with proper cooling and monitoring. Power consumption increases significantly with higher frequencies, reducing battery life proportionally.
Nintendo Switch Overclocking Configuration and Installation Process
Setting up Nintendo Switch overclocking begins with installing sys-clk through your custom firmware’s homebrew menu. The configuration file located at /config/sys-clk/config.ini contains all frequency settings. You can edit this file through the Homebrew App Store (hbmenu) or directly via computer when connecting your Switch in USB mode.
To access configuration: boot into Hekate bootloader, go to Tools > USB Tools > SD Card, then connect your Switch to your computer. Your microSD card will be accessible as a regular drive. Game-specific profiles enable optimized performance for demanding titles while maintaining conservative settings for less intensive games. The configuration system supports separate settings for handheld, docked, and charging states.
Advanced Nintendo Switch Overclocking Techniques and Temperature Management
Advanced Nintendo Switch overclocking involves fine-tuning voltage curves and exploring extended frequency ranges. Some modified sys-clk versions remove safety limits, but these pose significant hardware risks. WE DO NOT RECOMMEND using modified versions as they can permanently damage your console.
Temperature monitoring becomes critical at higher frequencies. Various homebrew tools provide real-time thermal data through Tesla overlays. Sustained temperatures above 80°C indicate excessive thermal stress. Applications like Status Monitor Overlay enable continuous monitoring of CPU, GPU, and SOC component temperatures during gaming sessions.
Troubleshooting Common Nintendo Switch Overclocking Issues
Nintendo Switch overclocking can cause various stability issues requiring systematic troubleshooting. System crashes during gaming typically indicate excessive CPU or GPU frequencies. Memory-related crashes often manifest as filesystem corruption or save data loss, requiring immediate frequency reduction.
CRITICAL WARNING: Before any overclocking attempt, create a complete NAND backup via Hekate bootloader. This backup enables full system recovery in case of serious problems. Thermal protection mechanisms may trigger automatic shutdowns if temperatures exceed safe limits. Fan noise increases significantly under overclocked conditions, indicating elevated thermal stress.
Conclusion
Nintendo Switch overclocking can substantially improve gaming performance when approached with proper knowledge and extreme caution. The combination of sys-clk configuration, thermal monitoring, and conservative frequency selection enables safe performance enhancement. Remember that overclocking inherently reduces hardware lifespan and voids manufacturer warranties.
Most users find memory overclocking provides the best performance-to-risk ratio, while CPU and GPU adjustments require more careful consideration. Always prioritize system stability over maximum performance and maintain comprehensive backups of your system configuration. With proper precautions, overclocking can enhance your Switch gaming experience while preserving system integrity.
Enhanced performance opens up new possibilities – explore our collection of the best handheld games that truly benefit from extra power.

Unlock the full potential.
ModSmith covers everything from emulation to firmware tweaks. His guides demystify EmuDeck setups, custom firmware, homebrew, and console optimization. If it can be modded, patched, or customized, he’s already done it.